
I know that nail art is not my theme but after seeing a lot of bloggers doing nail art tutorials I could not stop myself. I was inspired to do this after reading a blog called Wiseshe. She does amazing nail arts.
So here is the tutorial:
Items used:

1. Base Coat (Transparent)
2. Red nail paint (I used Elle 18 nail pops collection no.52)
3. Yellow nail paint (Here again I used Elle 18 nail pops no.49)
4. Pink color two way nail art polishes (It’s from a local brand whose name I don’t know)
5. Transparent polish (Again from a local brand. But the good thing is it has stars in itJ. It’s an optional choice.)
6. Nail paint remover
7. Cotton Ear Buds
8. A thin nail art brush
The Procedure-
Step 1- Clean any old nail paint and apply a base coat.

Step 2- After the base coat dries, apply red nail paint.

Step 3- Using a thin brush; apply yellow nail paint at the corners.

Step 4- Let it dry. Use the two-way nail art polish and make floral stripes.

Step 5- After it dries to give it a good finishing touch apply base coat or a transparent polish with any sequins in it like the one I used.
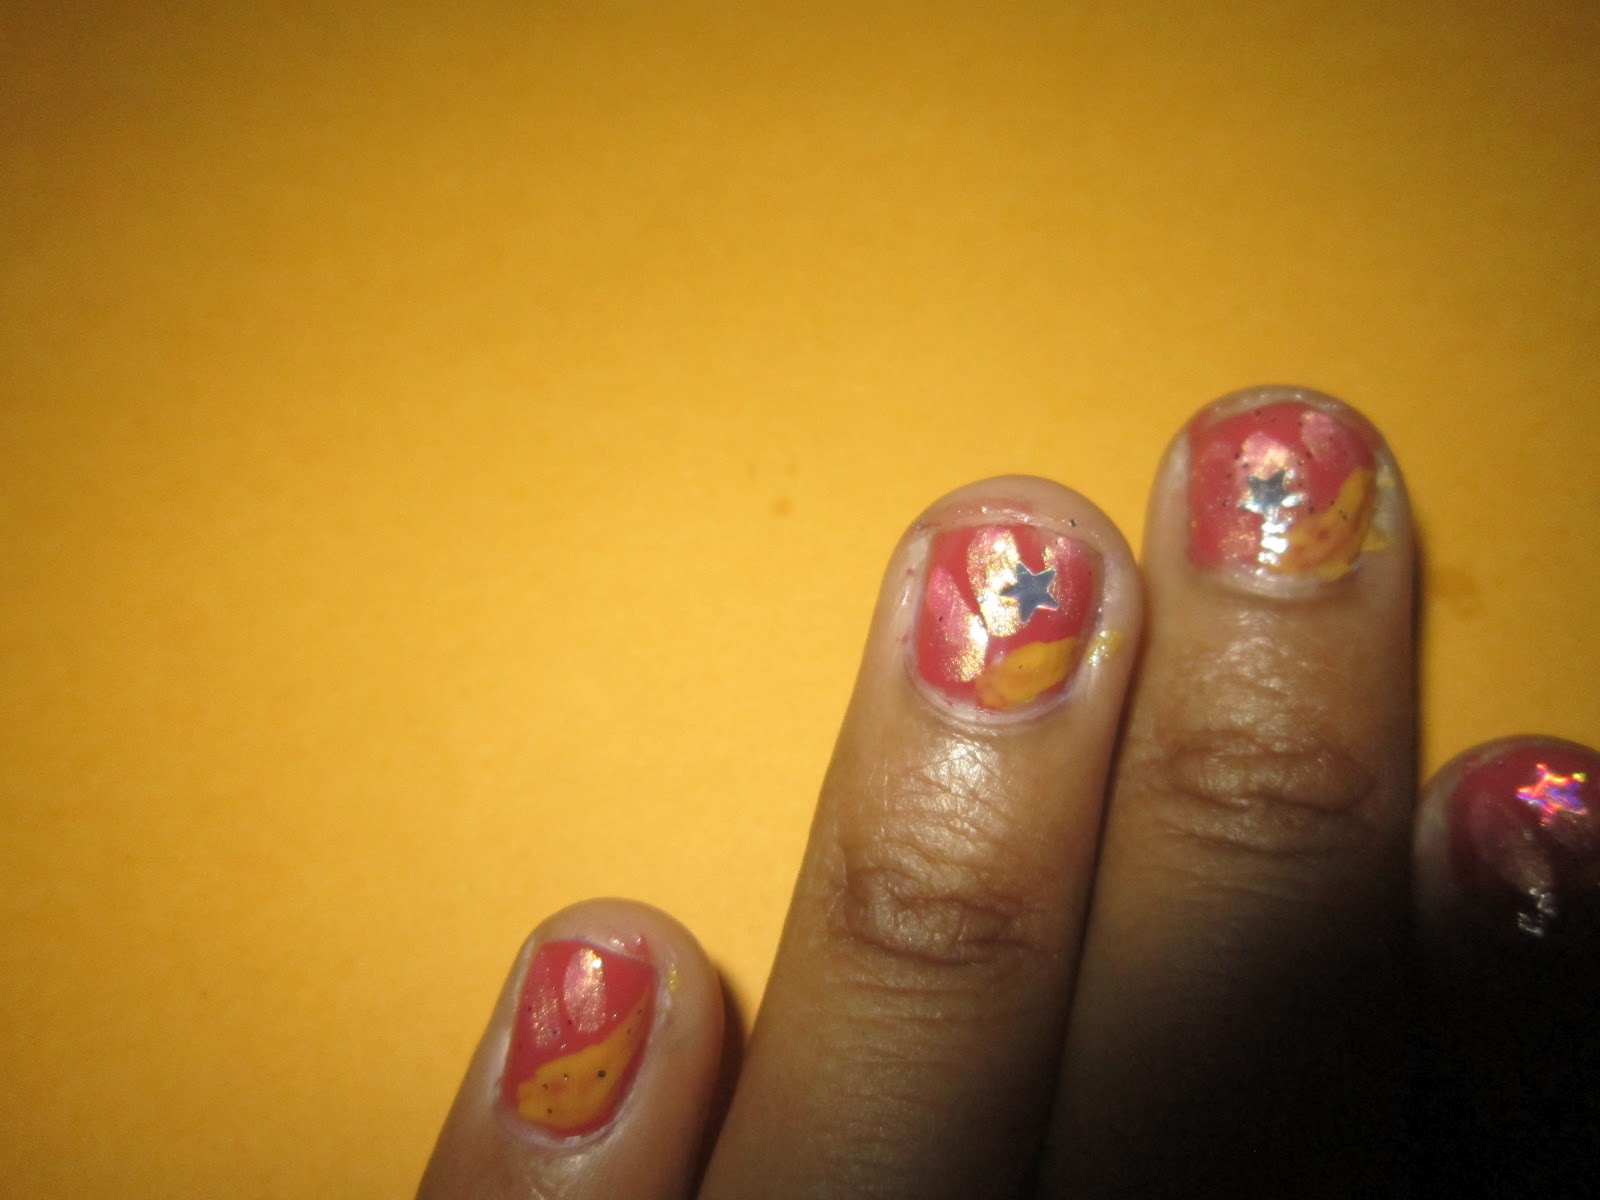
And viola!!! It’s done.
Go out and flash your nails.
My Polyvore dedication: I know any Polyvore set is not required but I am going to show you all a set on how to wear your outfit with any nail art of your choice. See Bleed Blue

My fav item used in this tutorial: My star nail paint. Love it ↑.
Get inspired and create your own art but whatever you do remember “KEEP IT SIMPLE, STAY STYLISH AND COMFORTABLE.” :)
0 comments:
Post a Comment